Her work is all very colorful and it shows how much time and dedication she takes into this type of work. This photo caught my eye specifically because it shows very many details, and I like the colors that are in the picture.
Derek Lopez
Her work is all very colorful and it shows how much time and dedication she takes into this type of work. This photo caught my eye specifically because it shows very many details, and I like the colors that are in the picture.
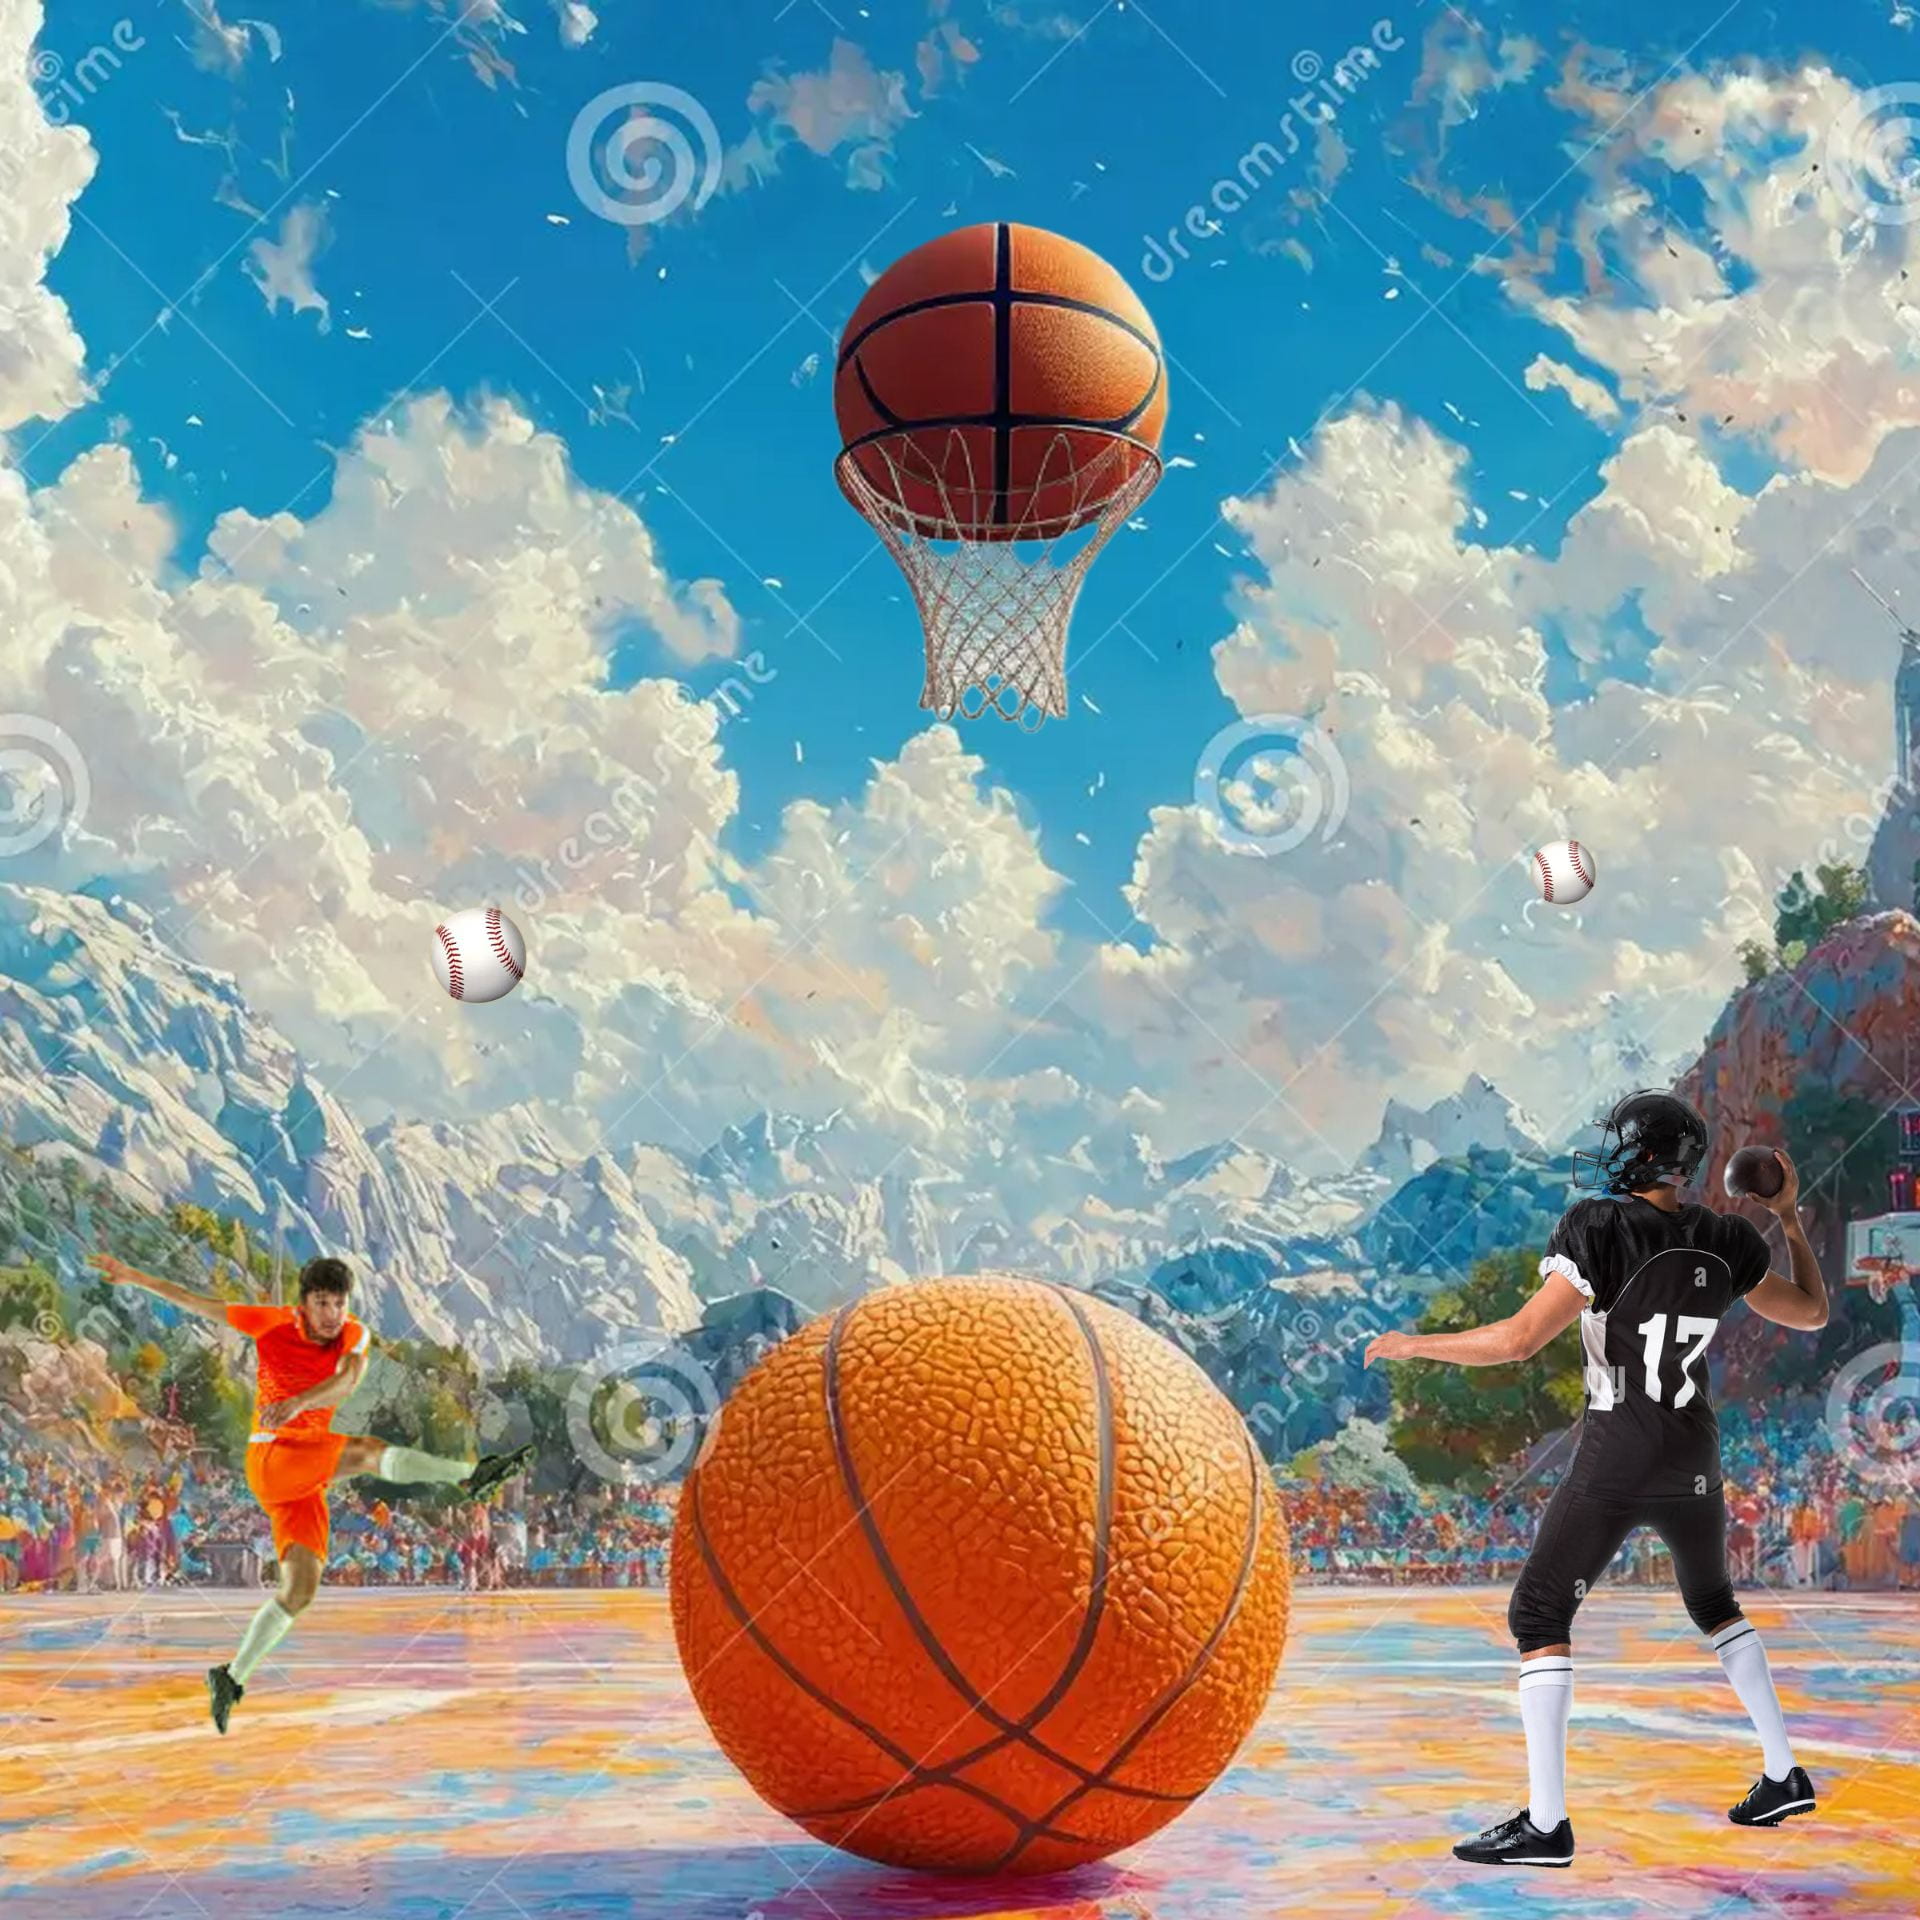
My surrealistic collage holds up to atleast 5 different parts of images from different pictures I got off the internet. I kind of wanted to make it like sports surrealism focusing a little more on the basketball side though. I added a soccer player making it seem like he is kicking the basketball. I have a football player about to throw the football into the crowd. I have some baseballs watching all this from above and same with a floating basketball which is like the king off all of this.

White balance in photography is a crucial tool for ensuring that colors in your images look natural and true to life. Different light sources, like sunlight or artificial lights, can give your photos a color cast that might not match what you see with your eyes. Adjusting the white balance helps correct these color shifts and makes sure your images look more realistic. There are several white balance settings to choose from, each designed for specific lighting conditions:
Auto White Balance (AWB): The camera automatically adjusts the white balance based on the scene’s lighting, making it an easy choice for most situations.
Daylight/Sunny: Ideal for bright, sunny days, this setting maintains a natural color balance without any adjustments.
Cloudy: This setting warms up your photos when shooting on overcast days, balancing out the cooler tones from the cloud cover.
Shade: Used when shooting in shaded areas, it helps warm up the image to counter the cooler tones of the shadow.
Tungsten/Incandescent: Great for shooting indoors with incandescent bulbs, it adds blue tones to remove the yellowish hue often caused by these lights.
Fluorescent: This setting compensates for the greenish cast often seen under fluorescent lighting by introducing a touch of magenta.
Flash: Optimizes white balance when using a flash, especially in low-light situations, to ensure the colors look natural.
Custom: Allows you to manually set the white balance by photographing a neutral gray or white object, giving you precise control for tricky lighting situations.


Nonchalant
Sleepy
Serious
Calm
Funny
Nice
Cool
Humble
Honest
Clever
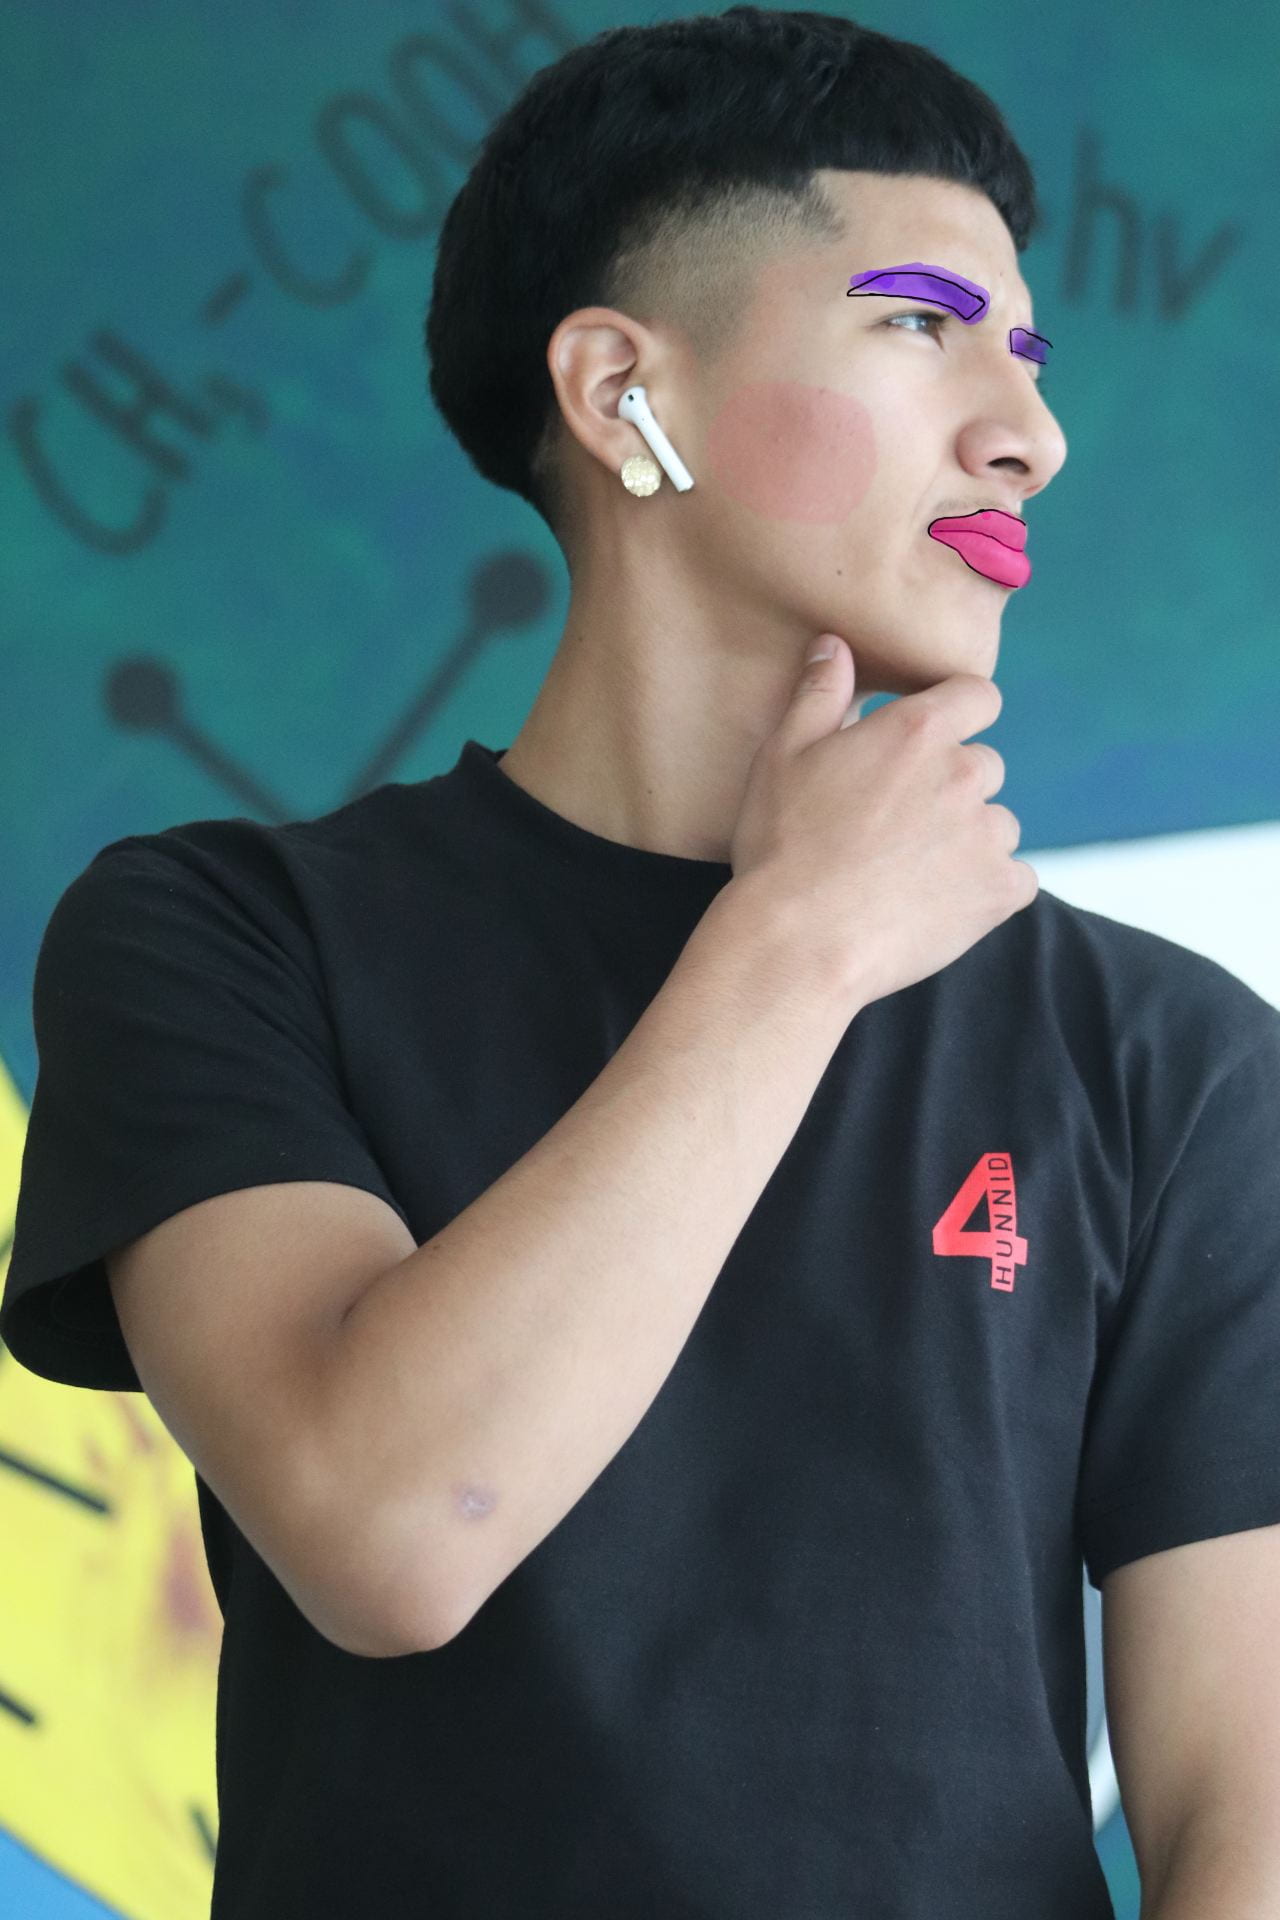

One tip I would give is to really take your time and zoom in and see what type of makeup you would like to put on.
Another tip I would give is to bring the opacity low on the brush to make sure you move over the area over and over, so it blends.
Another tip is to use the healing brush tool to remove any pimples, acne, etc.
Another tip is to try and get a portrait of the persons full face, so it is easier to draw on.
The last tip is to use a variety of colors, so the makeup comes out good and funny at the same time.
The first one catches my eye because it is about one of my favorite fast-food places, Mcdonalds. The second one caught my eye because it is about adidas being the gold and they are using Carmelo Anthony in this ad. The last one caught my eye because it uses Nike and Iron Man showing that he makes the shoe.

The client was my friend Arnold and the company I am representing is That’s A Awful Lot of Cough Syrup. The product is clothing, and it is very popular streetwear. The target audience is people who are really involved in clothing. I would expect to see this advertisement online and on billboards. I am going to use studio lighting to make this advertisement look more professional. The props were the T-shirt, the strobes, and the backround.
HDR photography is a technique that is used to capture amazing details in the highlight and shadows of pictures.
I chose this image because it gives off a nice and crazy looking vibe to the sky and water. The reflection of the bright sundown and clouds reflecting off the water gives a very nice visual to the picture. This picture gives a nice vibe of mother nature and an amazing summer day coming to an end. In my opinion I chose this picture because it is very nice to look at.

Underexposed Exposure
Normal Exposure
1 Stop Underexposed Exposure
1 Stop Overexposed Exposure
2-3 Stops Overexposed Exposure
1. JPEG (.jpg)
JPEG is your go-to for photos online, balancing good quality with small file sizes.
2. HEIF (.heif)
HEIF saves high-quality photos with smaller file sizes, and it’s used by newer phones.
3. TIFF (.tiff)
TIFF is for images that need to stay crystal clear and detailed, often used by photographers.
4. RAW (.raw)
RAW captures every detail from your camera without any editing, giving you full control over the image later.
5. DNG (.dng)
DNG is Adobe’s version of RAW that works across different cameras and is easier to manage long-term.
6. PNG (.png)
PNG is perfect for images that need to stay sharp and can have transparent backgrounds.
7. GIF (.gif)
GIF is great for short, fun animations and looping images, but it’s limited in color.
8. BMP (.bmp)
BMP keeps things simple, storing your image without any compression but making file sizes huge.
9. PSD (.psd)
PSD is the file for Photoshop users, saving all your layers and edits for easy tweaking later.